Split AC Wiring Diagram PDF: A Comprehensive Guide
Navigating split AC systems requires detailed diagrams‚ often found in PDF format‚ for safe and effective installation․ Understanding these
diagrams‚ alongside manufacturer instructions‚ is crucial for proper functionality and troubleshooting‚ especially concerning voltage requirements․
Understanding Split AC Systems
Split air conditioning systems offer zoned cooling‚ separating the indoor air handling unit from the outdoor compressor․ This design enhances efficiency and allows for flexible installation‚ but introduces complexity in wiring․
A split AC wiring diagram PDF is essential because these systems involve multiple electrical connections between the indoor and outdoor units‚ requiring precise adherence to schematics․
Typically‚ a split system utilizes a control wire to communicate between the units – the indoor unit signals the outdoor unit to activate․ Power supply considerations are vital; while some mini-splits operate on 120V‚ most require 240V․
Incorrect voltage can cause significant damage․ Furthermore‚ local electrical codes often mandate a disconnect switch near the indoor unit for safety during maintenance․ Always prioritize manufacturer’s instructions and consult a qualified electrician․
Components of a Split AC Unit
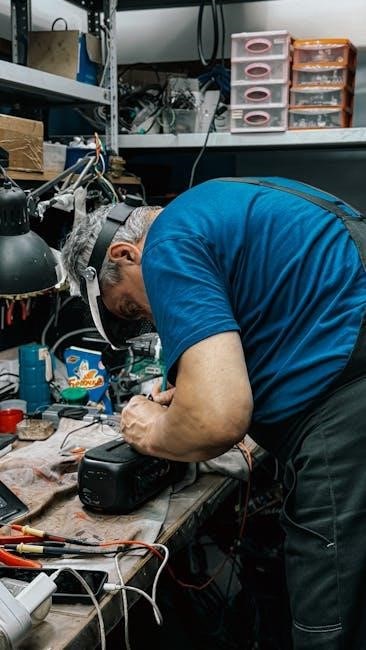
A split AC unit fundamentally comprises two main components: the indoor unit and the outdoor unit․ The indoor unit houses the evaporator coil‚ blower fan‚ and air filters‚ responsible for cooling and circulating air․ The outdoor unit contains the compressor‚ condenser coil‚ and another fan‚ handling heat rejection․
Essential electrical components include the compressor motor‚ fan motors (both indoor and outdoor)‚ and various control circuits․ A split AC wiring diagram PDF details the connections for each of these․ Crucially‚ the diagram will illustrate the power supply connections (Line and Neutral) for both units‚ alongside the control wiring linking them․ Don’t overlook the drainage system‚ as condensate pumps may require separate power․ Understanding these components is vital when interpreting the wiring diagram;
Voltage Requirements: 120V vs․ 240V
Split AC systems commonly operate on either 120V or 240V‚ significantly impacting wiring requirements․ While some mini-splits can function on 120V‚ most utilize 240V for greater efficiency and cooling capacity․ A split AC wiring diagram PDF will clearly indicate the required voltage for the specific unit․
240V systems generally require dedicated circuits and larger gauge wiring․ 120V units may utilize standard household circuits‚ but may have limitations․ It’s crucial to verify the voltage compatibility before installation․ Furthermore‚ some systems can accommodate 208V‚ which is often found in commercial settings‚ effectively functioning as a 230V/240V system․ Always consult the manufacturer’s instructions and the wiring diagram to ensure correct voltage application․
Wiring Diagram Basics: Key Symbols and Notations
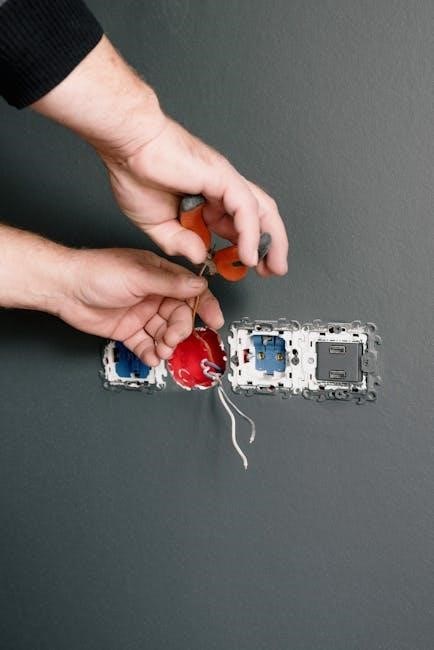
A split AC wiring diagram PDF employs standardized symbols to represent components․ Understanding these is vital for interpreting the diagram correctly․ Line (L) and Neutral (N) indicate power supply connections․ Ground (G) signifies the earth connection for safety․ Symbols represent components like compressors‚ fan motors‚ and capacitors․
Notations detail wire colors‚ sizes‚ and connection types․ Diagrams often use abbreviations for functions like “COM” for common and specific voltage ratings․ Pay close attention to any warning symbols or special instructions․ Familiarizing yourself with these basics‚ alongside the manufacturer’s documentation‚ ensures accurate wiring and prevents potential hazards․ Always prioritize safety and double-check connections against the diagram․
Indoor Unit Wiring
The indoor unit’s wiring involves power supply‚ control signals to the outdoor unit‚ fan motor connections‚ and considerations for the drainage system․
Power Supply Connection (Line and Neutral)
Establishing a secure power supply connection – line and neutral – is paramount for indoor unit operation․ Diagrams clearly illustrate how to connect these wires‚ often requiring adherence to local electrical codes․
Typically‚ a dedicated circuit is recommended to prevent overloading․
Carefully identify the line and neutral wires‚ as incorrect connections can cause serious damage or safety hazards․ Some units‚ particularly those with UL listing and supplied cords‚ may be 120V‚
though 240V is more common․ Always consult the manufacturer’s instructions and wiring diagrams‚ as details vary significantly between models like Mitsubishi and Everwell․
A disconnect switch near the indoor unit may be required‚ depending on the manufacturer’s specifications․ Proper grounding is also essential for safety and optimal performance․
Control Wiring to Outdoor Unit
The control wiring establishes communication between the indoor and outdoor AC units‚ initiating the cooling or heating process․ Split AC wiring diagrams detail the specific wire colors and terminal connections for this crucial link․
Typically‚ this involves low-voltage wiring‚ transmitting signals rather than carrying the main power load․ The indoor unit often signals the outdoor unit to activate once power is established on the indoor side – a common issue when troubleshooting․
Accurate wiring is vital; incorrect connections can prevent the system from functioning correctly․ Diagrams‚ like those for Mitsubishi units‚ illustrate these connections clearly․ Referencing the manufacturer’s documentation is essential‚ as Everwell units‚ for example‚ may have unique wiring configurations;
Fan Motor Wiring
Split AC wiring diagrams meticulously illustrate the fan motor connections within both the indoor and outdoor units․ These diagrams delineate the wiring for the fan’s speed control‚ often utilizing multiple wires to adjust airflow․
Understanding the wiring color codes is paramount‚ as they vary between manufacturers․ Diagrams typically show how to connect the fan motor to the unit’s control board‚ ensuring proper operation․
Incorrect fan motor wiring can lead to several issues‚ including the fan not running‚ running at the wrong speed‚ or even motor burnout․ Always consult the specific wiring diagram for your unit‚ such as those available for Mitsubishi models‚ and prioritize safety when working with electrical components․
Drainage System and its Impact on Wiring
While seemingly unrelated‚ the split AC drainage system can indirectly impact wiring considerations․ Condensation produced during cooling requires a drain line‚ and its routing must avoid electrical components․
Wiring diagrams don’t directly depict the drain line‚ but installers must ensure it doesn’t interfere with wiring pathways․ Water ingress near electrical connections poses a significant safety hazard and can cause short circuits․
Proper installation involves securing the drain line away from wiring‚ and ensuring it doesn’t create a pathway for water to reach sensitive components․ Some units may require specific clearances‚ detailed in the manufacturer’s instructions․ Ignoring this can lead to corrosion and system failure‚ highlighting the importance of a holistic installation approach․

Outdoor Unit Wiring
The outdoor unit’s wiring involves connecting the compressor‚ fan motor‚ and power supply‚ often requiring a disconnect switch for safety and maintenance procedures․
Compressor Wiring
Compressor wiring is a critical aspect of split AC installation‚ demanding meticulous attention to detail․ Typically‚ this involves connecting the compressor to the power supply via a contactor‚ which acts as a switch controlled by the indoor unit․

Wiring diagrams will illustrate the specific connections‚ often including a capacitor for starting the compressor motor․ It’s vital to verify the compressor’s voltage and amperage requirements against the power supply․ Incorrect wiring can lead to compressor failure or safety hazards․
Pay close attention to grounding instructions‚ ensuring a secure earth connection․ Referencing the manufacturer’s wiring diagram is paramount‚ as configurations can vary significantly between models․ Always double-check connections before energizing the system‚ and remember that a qualified electrician should handle this task․
Fan motor wiring‚ both in the indoor and outdoor units‚ requires careful adherence to the wiring diagram․ Typically‚ these motors are single-phase and utilize a capacitor for starting and running․ The diagram will show connections for power supply (line and neutral)‚ speed control (if applicable)‚ and grounding․
Incorrect wiring can cause the fan to operate at the wrong speed‚ fail to start‚ or even overheat․ Pay attention to the capacitor’s specifications – using the wrong capacitor can damage the motor․ Ensure all connections are secure and properly insulated․
Always disconnect power before working on fan motor wiring․ The manufacturer’s instructions are crucial‚ as wiring colors and configurations can differ․ A qualified electrician is recommended for this task‚ ensuring safety and proper functionality․
Establishing a secure power supply connection – line and neutral – is fundamental to split AC operation․ The wiring diagram clearly indicates the designated terminals for these connections within both the indoor and outdoor units․ Correct polarity is paramount; reversing line and neutral can cause serious damage․
Voltage compatibility is critical․ Confirm the unit’s voltage requirement (120V or 240V) matches the available power supply․ A dedicated circuit breaker‚ sized appropriately for the AC unit’s amperage‚ is essential for safety and preventing overloads․
Proper grounding is non-negotiable․ Connect the ground wire to the designated grounding terminal to protect against electrical shock․ Always disconnect power before making any connections‚ and consult a qualified electrician if unsure․
Disconnect Switch Installation
A disconnect switch is a vital safety component in split AC systems‚ enabling quick power shut-off during maintenance or emergencies․ Many manufacturers‚ like Everwell‚ require a disconnect switch at the indoor unit‚ as indicated in their instructions and wiring diagrams․
The switch should be installed in a readily accessible location‚ near the unit but not directly exposed to weather․ It must be rated for the voltage and amperage of the AC system․ Wiring diagrams illustrate the correct placement of the disconnect switch within the circuit․
Local electrical codes often mandate disconnect switch installation․ Ensure compliance with these regulations for a safe and legally sound setup․ Always de-energize the circuit before working on the disconnect switch․

Common Wiring Configurations
Diverse split AC units—Mitsubishi‚ Everwell‚ and others—employ unique wiring setups․ Voltage variations (208V‚ 230V/240V) significantly impact wiring diagrams and component connections․
Mitsubishi Split Unit Wiring (Example Diagram)
Mitsubishi split systems often utilize a standardized wiring approach‚ though variations exist between models․ A readily available example diagram‚ found at RectorSeal‚ illustrates typical connections․
This diagram details power supply connections for both indoor and outdoor units‚ showcasing line and neutral wire placements․ Control wiring‚ crucial for communication between units‚ is clearly depicted․ Pay close attention to the compressor and fan motor wiring‚ noting the specific terminal designations․
The diagram also highlights the importance of a disconnect switch‚ often required by local electrical codes‚ for safe maintenance․ Always verify the diagram matches your specific Mitsubishi model‚ as discrepancies can lead to malfunctions or safety hazards․ Referencing the manufacturer’s documentation is paramount․
Everwell Unit Wiring Considerations
Everwell split AC units present unique wiring challenges‚ often stemming from incomplete or inaccurate manuals; Users have reported issues with indoor units failing to power on‚ potentially indicating a problem with the initial power supply to the outdoor unit – as the indoor unit signals the outdoor unit to activate․
Troubleshooting Everwell systems requires careful attention to voltage compatibility․ A 208V system is functionally equivalent to a 230V/240V system‚ allowing connection to the higher voltage; However‚ always prioritize manufacturer specifications․
Due to documentation gaps‚ identifying correct wiring often necessitates inspecting the unit’s stickers directly after purchase․ These stickers provide crucial details absent from the manual․ Professional electrical assistance is strongly recommended to ensure safe and compliant installation․
208V vs․ 230V/240V Systems
Understanding the nuances between 208V and 230V/240V systems is critical when interpreting split AC wiring diagrams․ While seemingly distinct‚ a 208V system can often function equivalently to a 230V or 240V system in split AC applications‚ offering flexibility during installation․
This compatibility stems from the AC unit’s ability to adapt within a certain voltage range․ However‚ always verify the manufacturer’s specifications before connecting to a higher voltage․ Incorrect voltage can lead to component damage or system failure․
Wiring diagrams will clearly indicate the acceptable voltage range for the specific unit․ Careful attention to these details‚ alongside proper electrical safety practices‚ is paramount for a successful and safe installation․ Consult a qualified electrician if unsure about voltage compatibility․
Troubleshooting Wiring Issues
Accurate wiring diagrams are essential for diagnosing issues like units failing to power on‚ or voltage discrepancies‚ demanding careful inspection and adherence to safety protocols․
Indoor Unit Not Turning On
When the indoor unit fails to activate‚ a systematic approach utilizing the split AC wiring diagram PDF is vital․ First‚ verify power supply connections – line and neutral – at both the unit and the breaker․
Confirm the indoor unit receives power before expecting the outdoor unit to respond‚ as the indoor unit often initiates the outdoor unit’s operation․
Examine the control wiring connecting the indoor and outdoor units; a break here prevents communication․ Check the fan motor wiring for loose connections or damage․
Crucially‚ consult the manufacturer’s instructions and stickers on the unit itself‚ as details can vary significantly․ Some models require a disconnect switch installed at the indoor unit‚ which may be the source of the problem․
Remember‚ a 208V system is compatible with 230V/240V setups‚ but incorrect voltage can cause issues․

Outdoor Unit Not Turning On
If the outdoor unit remains inactive‚ begin troubleshooting by referencing the split AC wiring diagram PDF․ Ensure the compressor wiring is secure and undamaged‚ as this is a primary power consumer․ Verify the outdoor fan motor wiring for proper connections and functionality․
Confirm a stable power supply – line and neutral – reaches the unit‚ checking the disconnect switch installation for correct operation․
Remember‚ the indoor unit typically signals the outdoor unit to start; therefore‚ confirm the indoor unit is powered on first․
Voltage discrepancies are common culprits – a 208V system can often operate on 230V/240V‚ but verify compatibility․ Always prioritize the manufacturer’s instructions and the unit’s stickers for accurate wiring details‚ as manuals can sometimes be inaccurate․
Identifying Voltage Discrepancies
Voltage mismatches are frequent causes of split AC system failures; a detailed wiring diagram PDF is essential for diagnosis․ A common scenario involves 208V systems being adaptable to 230V/240V power sources‚ but careful verification is paramount․ Use a multimeter to accurately measure the voltage at both the indoor and outdoor units‚ comparing it to the specifications on the unit’s nameplate and within the wiring diagram․
Incorrect voltage can damage the compressor or other components․ Always consult the manufacturer’s documentation‚ as stickers on the unit often provide the definitive voltage requirements․ Discrepancies may indicate wiring errors or issues with the power supply itself․ Prioritize safety: if unsure‚ consult a qualified electrician․
Importance of Manufacturer’s Instructions and Stickers
Manufacturer’s instructions and unit stickers are paramount when working with split AC wiring diagrams PDF․ Often‚ manuals lack complete detail‚ making on-unit stickers the definitive source for voltage and wiring configurations․ These stickers frequently reveal crucial information not found elsewhere‚ like specific wiring requirements or the need for a disconnect switch at the indoor unit․
Always prioritize these sources over generalized diagrams․ Disregarding them can lead to incorrect wiring‚ potentially damaging the unit or creating a safety hazard․ The wiring diagram PDF should be used in conjunction with these details‚ not as a replacement․ Remember‚ a qualified electrician should always verify the installation․